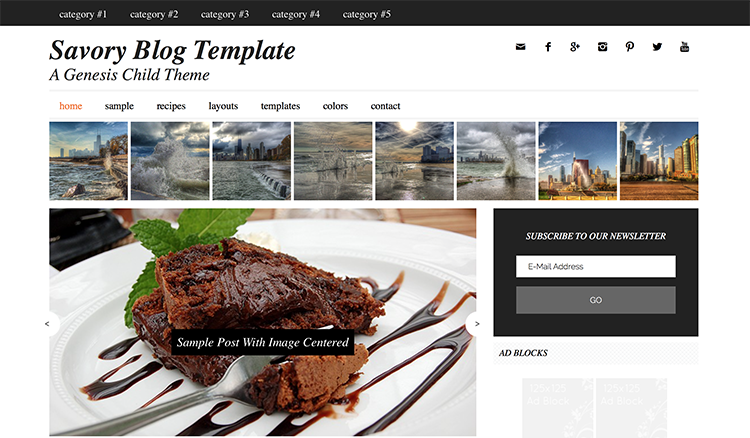
Thank you for using the Savory theme. Following are the instructions for setting up your site to resemble the Savory theme demo.
Make sure you have the following installed:
WordPress version 3.6+
Genesis Framework version 2.0+
Plugins
Before you begin, you will need to install and activate the following plugins Of course, you may substitute your favorite plugin, but this is the one used in the Savory theme demo:
Genesis eNews Extended
Simple Social Icons
Pinterest RSS Widget
Scrolled Trigger Boxes
THEME INSTALLATION
Once you have completed the pre-installation steps and you have the Genesis Framework installed, you may install the Savory theme. You will find theme installation instructions here.
HOW TO CONFIGURE THE GENESIS THEME SETTINGS
In your WordPress admin, navigate to Genesis > Theme Settings. Configure the Theme Settings as follows:
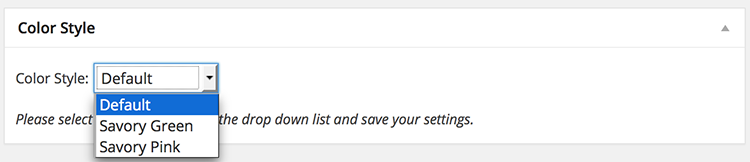
Color Style
Click on the Color Style Dropdown to select an alternative color scheme for your site.
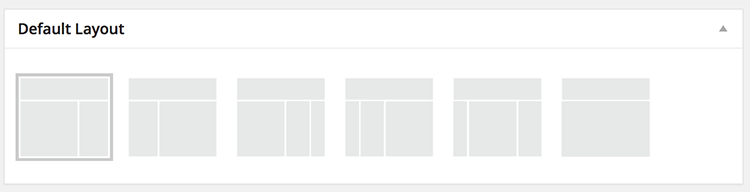
Default Layout
Click a thumbnail to select the Default Layout. The Savory theme uses the Content > Sidebar option.
Content Archives
For Content Archives, the default setting of “Display post content” is used by the demo.
For abbreviated content
Set the “Limit content to __ characters” option to 380 characters.
Check the “Include the Featured Image?” checkbox.
Select the “thumbnail (150 x 150)” Image Size.
Using the drop down box, select “Previous/Next” for the “Post Navigation Technique.”
Be sure to click the “Save Settings” button to preserve your changes.
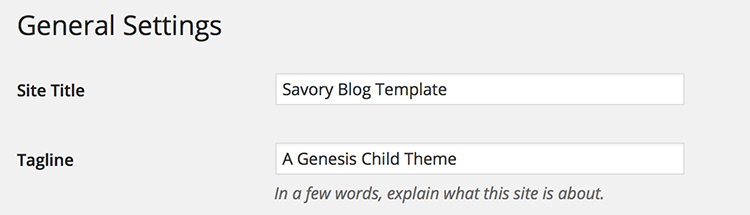
HOW TO SET THE SITE TITLE HEADER TEXT
The site title and description for your site can be set by navigating to Settings > General.
The Site Title will display in the upper left corner of your site.
The Tagline Setting will display below.
Be sure to click the “Save Settings” button to preserve your changes.
HOW TO USE A CUSTOM HEADER IMAGE
If you prefer a Logo Image rather than a text based Site Title it is possible to use a small logo style image that will display in the upper left corner of the site.
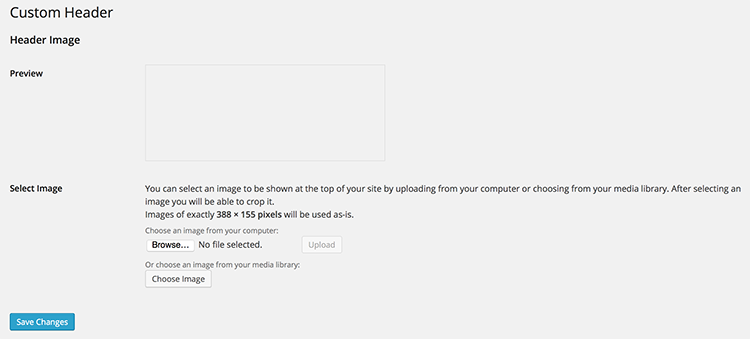
Navigate to Appearance > Header menu in your WordPress admin panel
Click “Browse” and Navigate to the image you would like to use for a Logo. Images of exactly 388 × 155 pixels will give the best results. Other sizes will be cropped in the upload process to create an image of the correct size.
Click “Upload” to copy the image from your computer to your website.
Be sure to click the “Save Settings” button to preserve your changes.
HOW TO CONFIGURE THE HEADER RIGHT WIDGET AREA
The Savory Theme Demo includes the Simple Social Icons plug in. Please be sure you have installed that plug in and drag the Simple Social widget box to the header and add your social profile links of choice.

Be Sure to click the “Save” button to preserve your settings
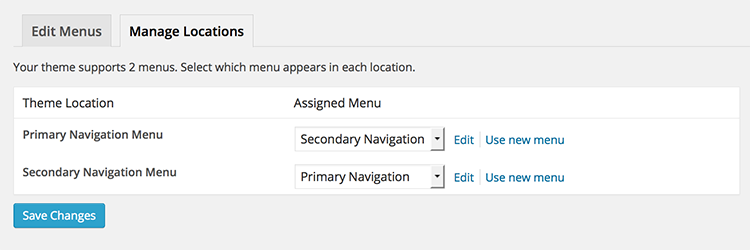
HOW TO CONFIGURE THE NAVIGATION MENUS
In the Savory theme, both the Primary Navigation Menu and Secondary Navigation Menu areas are utilized. The menus assigned to the default navigation areas can be set by navigating to Appearance > Menus > Manage Locations.
A Menu set in the Primary Navigation Menu location will display above header area of your site.
A Menu set in the Secondary Navigation Menu location will display immediately below the header area of your site.
Be sure to click the “Save Settings” button to preserve your changes.
HOW TO CONFIGURE THE HOME PAGE
Home Feature After Header: The Savory Theme is using Snap Widget to highlight an Instagram feed. This would also be a great place for a banner ad should you choose to put one there. If you do not wish to use this space, simply to not put anything into the widget.
To highlight your Instagram feed, go to Snap Widget here and click “Get your free widget”.
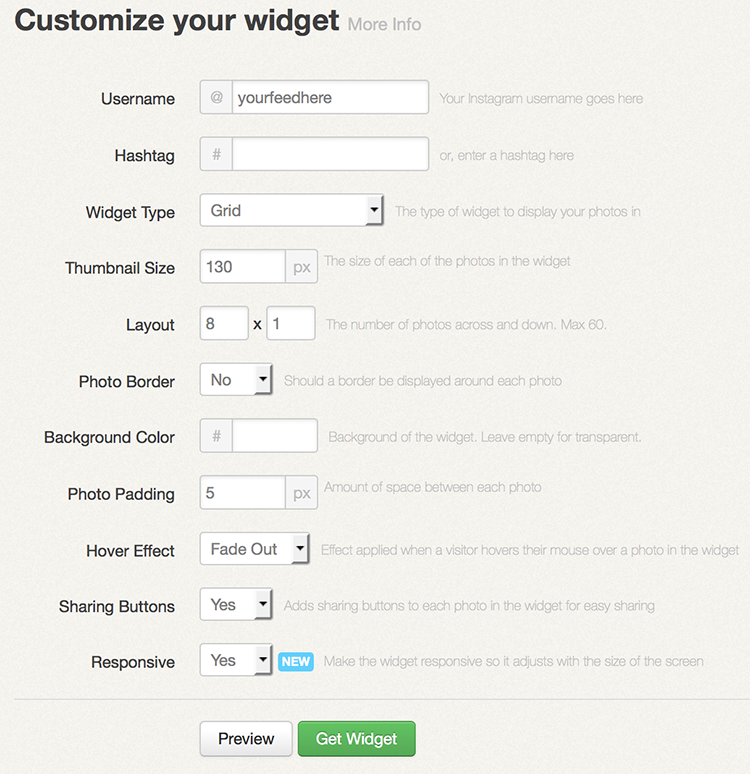
and place code into a text box.
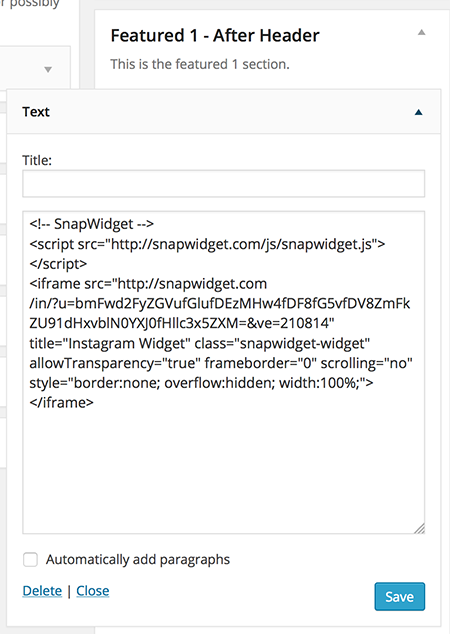
Always remember to click “Save”
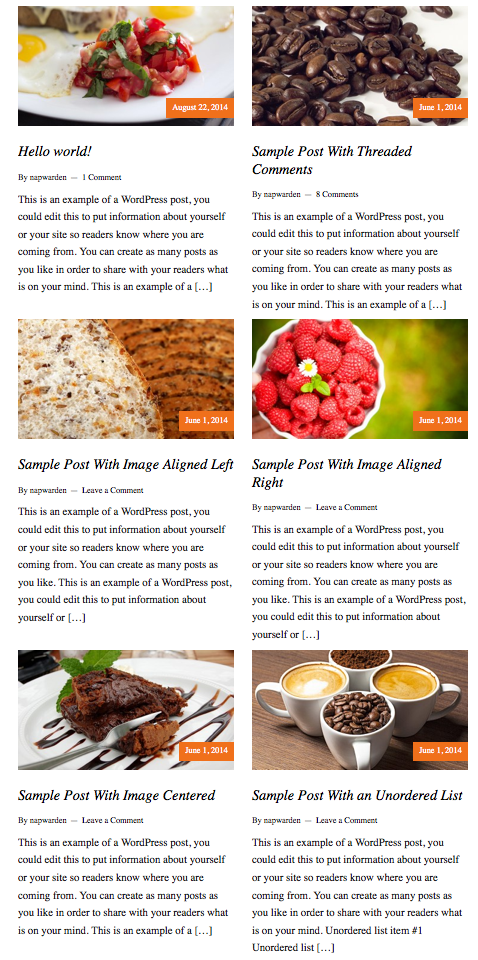
The Savory theme demo home page is configured to display the most recent six posts from a category named Featured in a “magazine” style layout. Several widget areas are included in the Savory theme and are designed to feature content in the Home – Top widget area most prominently.
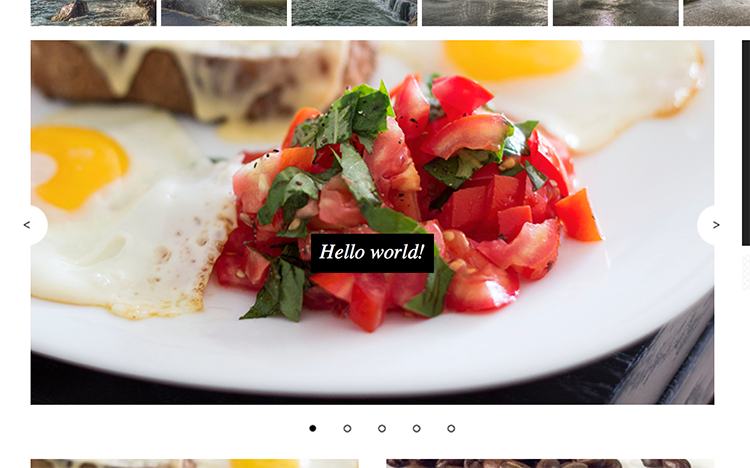
Home – Top: Genesis Responsive Slider
Home – Middle contains a single featured post with a medium sized sized featured image and shorter excerpt displayed with two posts horizontally across the page
Home – Bottom not used on demo site
How to Configure the Home – Top Widget Area
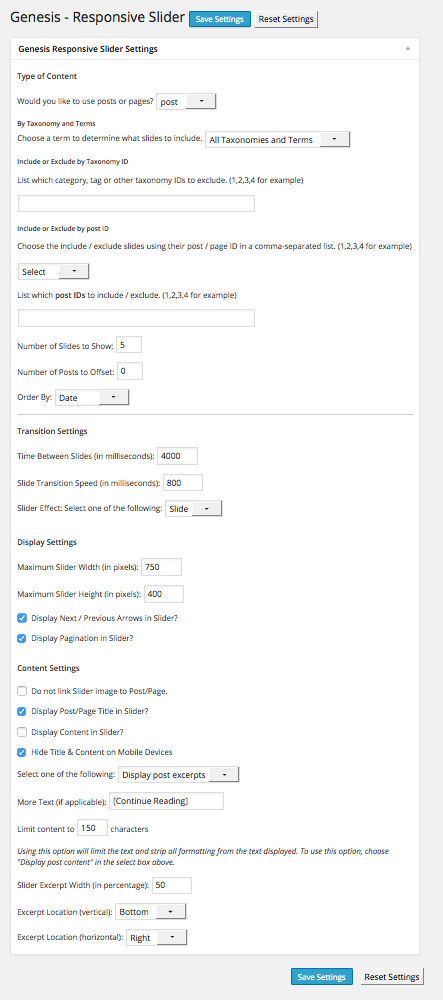
If you’d like to use the slider option, install the Genesis Responsive Slider plugin. After you install it, navigate to Genesis > Slider Settings and configure the settings to your preferences. Here’s a screenshot of how the demo site utilizes this plugin:
Now that your settings are configured, navigate to Appearance > Widgets and find the Home Top sidebar. Drag and drop the Genesis Responsive Slider widget into this sidebar area.
How to Configure the Home – Middle Widget Area
How to Configure the Home – Bottom Widget Area
While the Home – Bottom Widget Area widget is not used in the demo site, you can drag any widget you wish there.
HOW TO CONFIGURE THE PRIMARY SIDEBAR AREA
The following widgets are used in the Primary Sidebar area that displays to the right side of the content area.
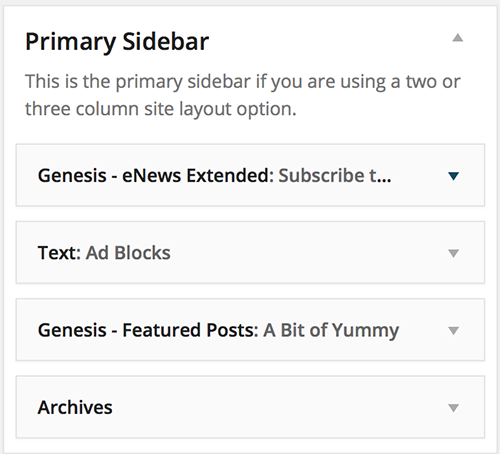
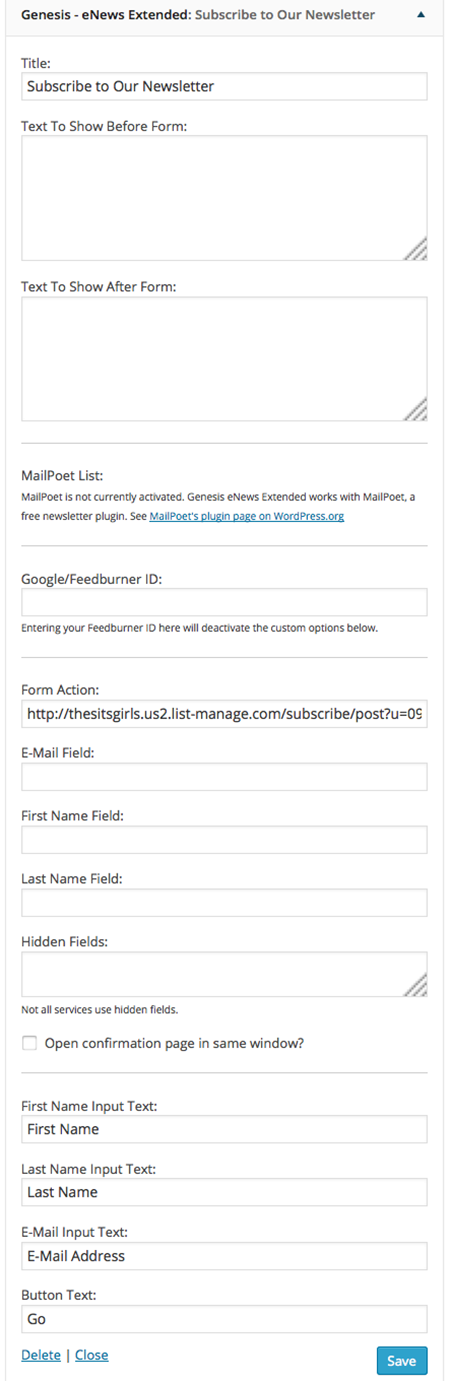
Genesis eNews Extended
Text Widget – add any ad code here
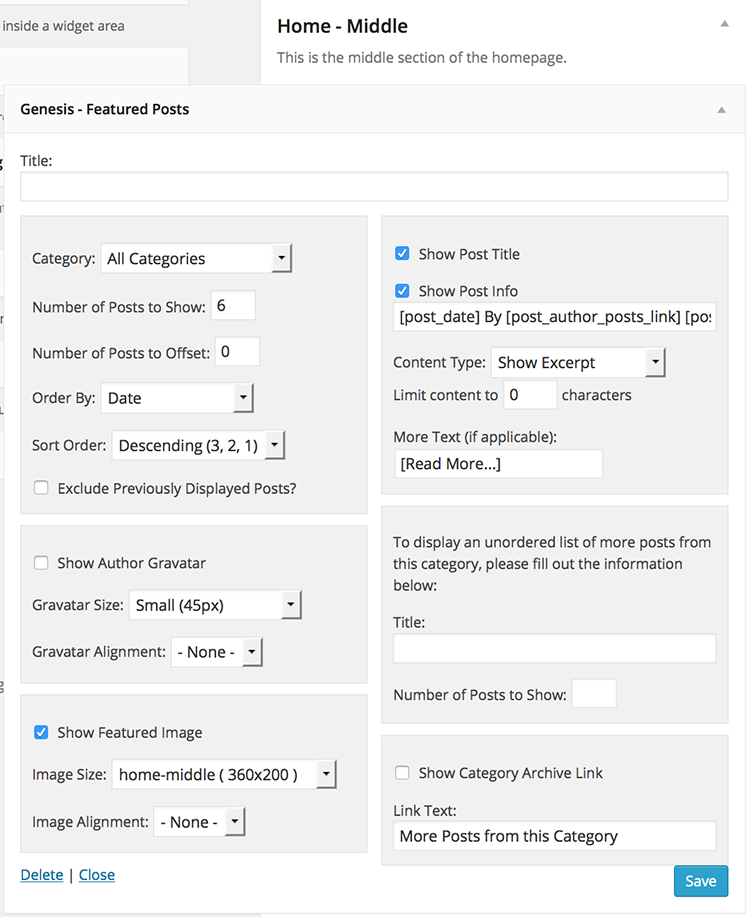
Genesis – Featured Posts

Archives – drag archives widget into sidebar
HOW TO CONFIGURE THE FOOTER WIDGET AREAS
The Savory theme demo uses the included 4 Footer Widget areas.
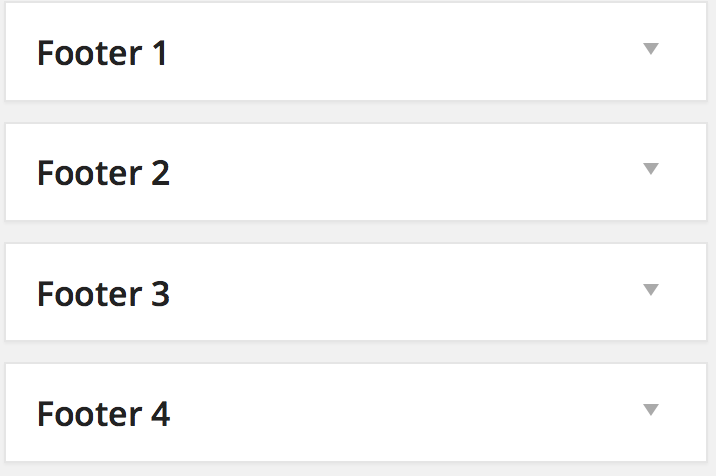
Footer 1 Widget Area:
Genesis User Profile
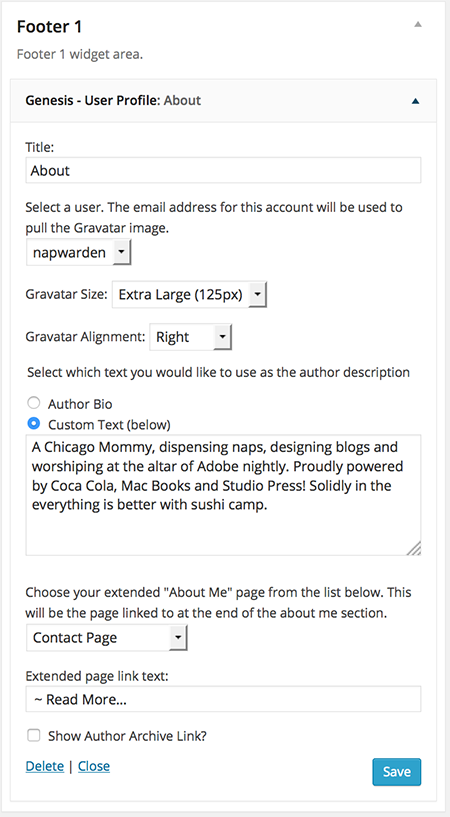
Be sure to click the “Save” button to preserve your changes.
Footer 2 Widget Area Settings:
Facebook Like Box. We recommend pulling this directly from Facebook here. Ours is 240 pixels wide, by 260 pixels high.
You will get two blocks of code.
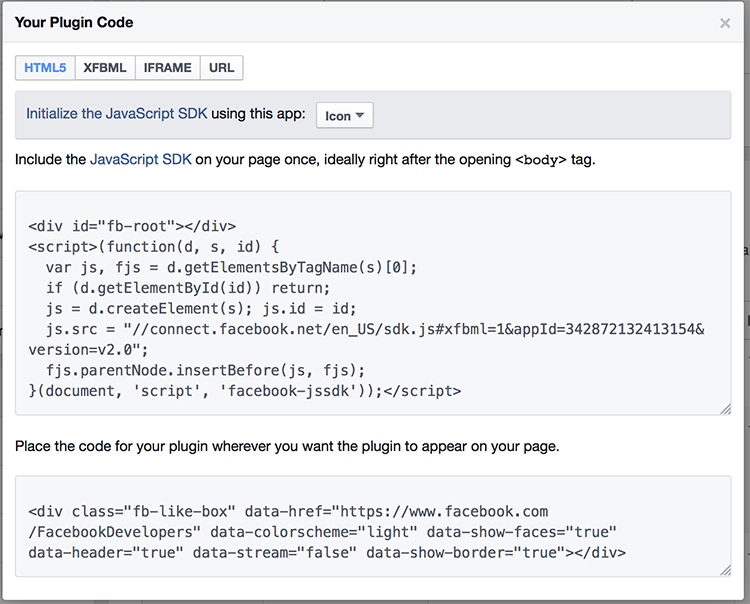
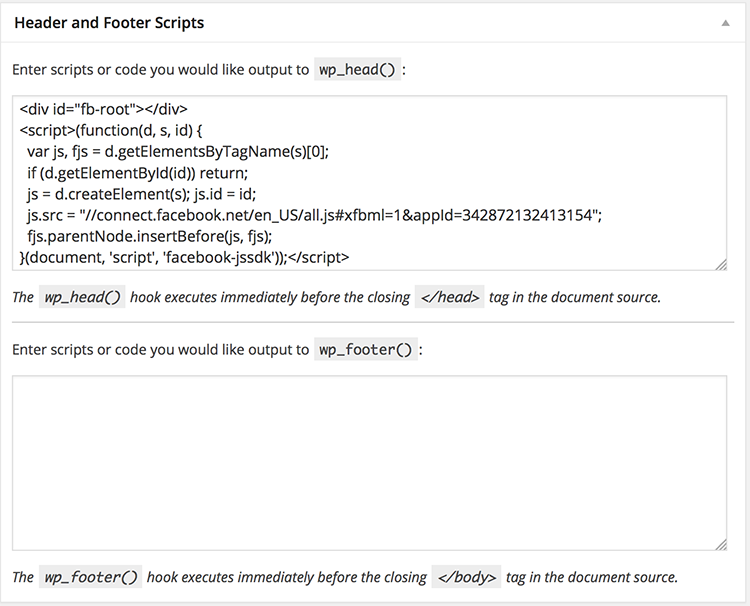
One goes in your Genesis<Theme Settings at the bottom where it says “Enter scripts or code you would like output to wp_head():”
The other goes in a text box dragged into footer 2.
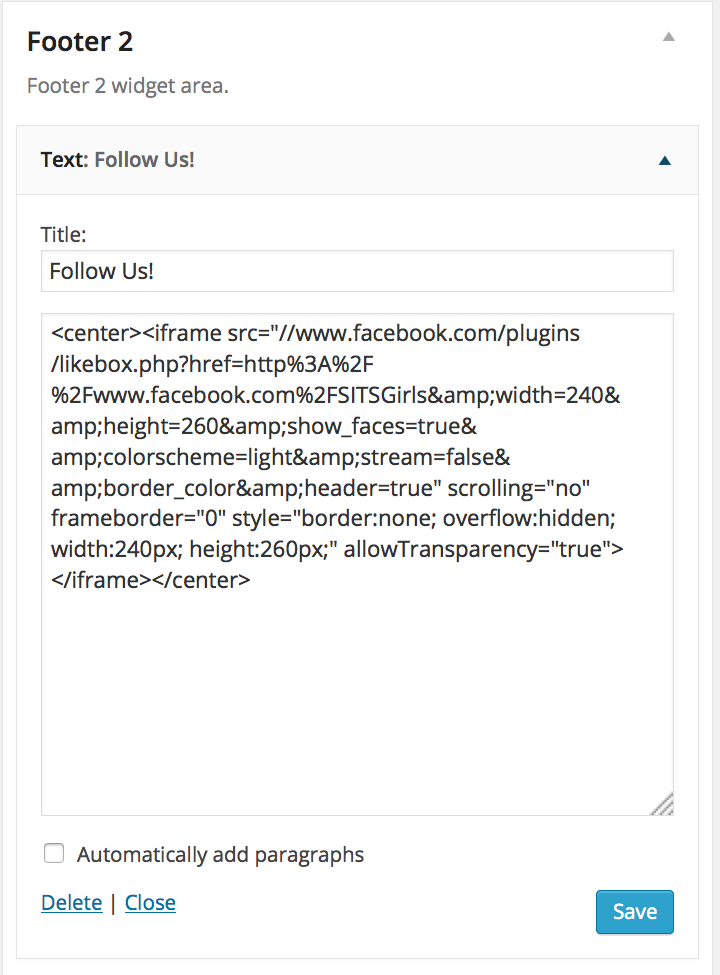
Be sure to click the “Save” button to preserve your changes.
Footer 3 Widget Area Settings:
Twitter Widget.
We recommend pulling this code directly from Twitter by going to your Twitter settings<Widgets. Simply create a new widget and paste this code into a text box in Footer 3. Ours is 240 pixels wide, by 260 pixels high.
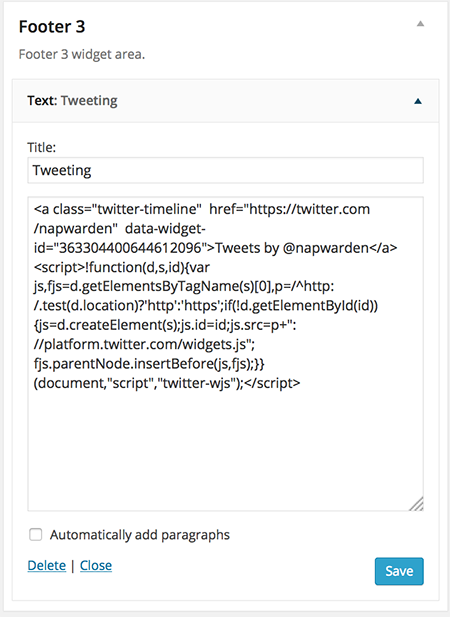
Be sure to click the “Save” button to preserve your changes.
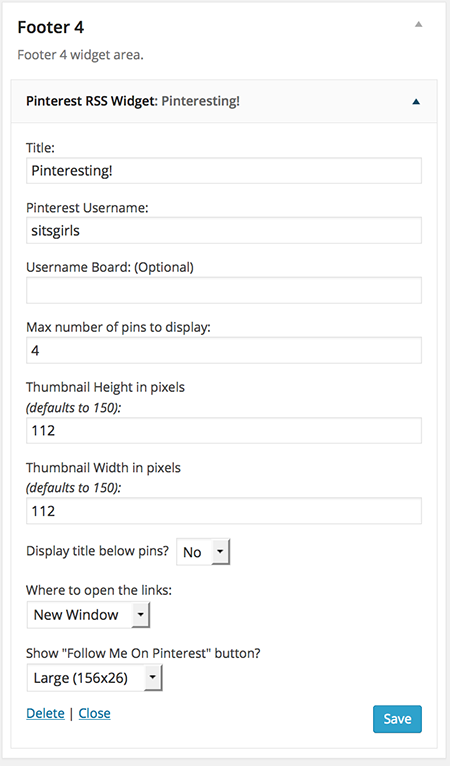
Footer 4 Widget Area Settings:
Pinterest RSS Widget. Make sure this plug in is installed and drag the widget box to the Footer 4 Widget Area.
AFTER ENTRY WIDGET AREA
An additional widget area is included and will display on Single Posts after the content and before the Author Box and Comments area when widgets are added to the area.
USING THE SCROLL TRIGGER BOX
This plugin is a great way to get more visitors to take a certain action, whether this action is..
- .. subscribing to your newsletter
- .. sharing a post
- .. submitting a contact form
- .. or something entirely different, you decide!
Really anything is possible, from social media sharing options to sign-up or contact forms. The plugin is designed to work with any other plugin that uses shortcodes.
Creating a Scroll Triggered Box
- Go to Scroll Triggered Boxes > Add New
- Add some content to the box
- (Optional) customize the appearance of the box by changing the Appearance Settings
HOW TO CREATE A BLOG PAGE
When using a widgetized home page it can be helpful to create a general blog style page to display elsewhere on your site. For instructions on how to create this page follow the following steps:
Navigate to Pages > Add New in your WordPress Admin Panel
Create a New Page named “Blog”
In the right sidebar of the Page edit screen select the Blog option in the template dropdown menu.
Leave the Content of this page blank, it will not be displayed when using the Blog page template.
Publish the page.
Once the page has been published you can view the page to see a blog style list of recent posts. Link to this page in the custom menu of your choice.
Congratulations! You are now ready to begin adding content and personal touches to your new Savory and Genesis powered website.